Search
Filters
Close
3000GT / Dodge Stealth Performance Spark Plug Recommendations

Today we want to share some recommendations for what spark plugs to run, in terms of spark plug electrode material, spark plug heat range, spark plug gap, and other options. These recommendations are meant for modified cars, from BPU to wild. The stock or parts store plugs are acceptable for a bone stock 3000GT or Dodge Stealth. Non turbo cars also tend to run just fine on stock platinum type plugs from Denso or NGK.

Spark Plug Materials

Spark plugs most commonly come in the following 3 materials:

  • Iridium
    • This is a precious metal that is laser welded and allows for a very fine electrode that can help reduce the requirements of your secondary ignition system, namely your coils. They are not without compromise though, they can be quite expensive, and rarely the electrode can break off on boosted or nitrous applications and this can damage your engine and turbo charger. Normally these should not be gapped.
  • Platinum
    • This is also a precious metal plug that is found in many oem applications, including the original spark plugs for the 3000GT and Dodge Stealth’s. They have a very long lifespan and can last from 60000 to 100000 miles.
  • Copper
    • These are a very affordable plug, a set of 6 is about $20.00. This allows them to be changed very frequently and you don’t have to worry so much about running rich while tuning ruining expensive Iridum or Platinum plugs. They are also easy to gap and do well in high boost environments. For most performance applications we recommend running a copper plug.

Heat Ranges

  • Heat Range 6
    • This is the stock heat range for a turbo car and is suitable for stock or very mildly modified cars. It will not foul easily and if you have a car that burns some oil these will last the longest without misfires.
  • Heat Range 7
    • We specifically recommend NGK 7 Series Plugs for this heat range. This is a good range for most BPU cars. 10 – 15 PSI on pump gas.
  • Heat Range 8
    • Once we start getting over 15 PSI or running e85 or methanol we’d recommend an 8 series plug. We personally use the NGK 8 Series Plugs for this. It is hard to put a precise upper limit on the power or boost you can run with these, but once we go colder than an 8 series plug you will have to be careful to have your tune not too rich and also run the car at WOT often to clean the plugs.
  • Heat Range 9
    • If you are running a maximum effort E85 or race gas car you may consider heat range 9 plugs like the NGK 9 Series.
  • Heat Range 10
    • With a maximum effort E85, race gas, or nitrous car you may want to step up to a heat range 10 plug like the NGK 10 Series. These may especially be needed if you do multiple gear pulls or top speed runs. They will probably tend to foul if you do a lot of cold starts or short trips. More suitable if you drive your car like your racing.

Spark Plug Gaps

The stock gap is in the .040 range and this is just too wide for our ignition system and running a lot of boost. There is some theory that you should run the largest gap possible, but we have not seen a lot of empirical evidence supporting this. It is very important that your ignition pulls cleanly. A misfire at high power can actually damage your rod bearings from the uneven load on the engine. Once you have found the point where you have no misfires you may want to gap down an additional .002 for wear and reliability.

  • .030″ Gap
    • Good all around gap, should not see spark blowout unless your ignition system is weak or running over 20 PSI.
  • .026″ – .028″
    • With a healthy ignition this is good for 20-25 PSI.
  • .022″ – .026″
    • Typically good for 25 to 30 PSI.
  • .020″ or less.
    • This is good if your ignition system is a little weak or you are running a lot of boost. As you get under .020″ you may eventually start to see some decreased idle quality, but it may be needed to light off high power setups, especially high boost E85 setups.

Resistor vs Non-Resistor Plugs

Resistor plugs typically have a 5 OHM resistor in them. This is done to prevent electrical or radio / RF interference. To get the most out of your ignition system it does seem a little bit unproductive to install a resistor in your ignition system though.

There are many systems, such as ignition amplifiers, or the AEM Series 2 ECU that recommend resistor plugs, but in real life we’ve never seen an issue running non resistor plugs. If you tend to listen to AM radio or have some weird eletronic glitches you may want to give resistor plugs a try, but we’d try the non resistor ones first. 

Transfer Case Bearing Pre-loads – 3000GT Spool Swap

Bearing pre-loads are critical to long life of any tapered roller bearing. It is very important when swapping a transfer case spool to reset the bearing pre-load. A different spool than the original one your transfer case came with may not be dimensional identical and aftermarket spools, while often very high quality, may bring additional dimensional variation.

During any transfer case rebuild we do as a part of our 3000GT / Dodge Stealth transfer case rebuild service we fully re-shim and reset all the bearings to ensure long life.

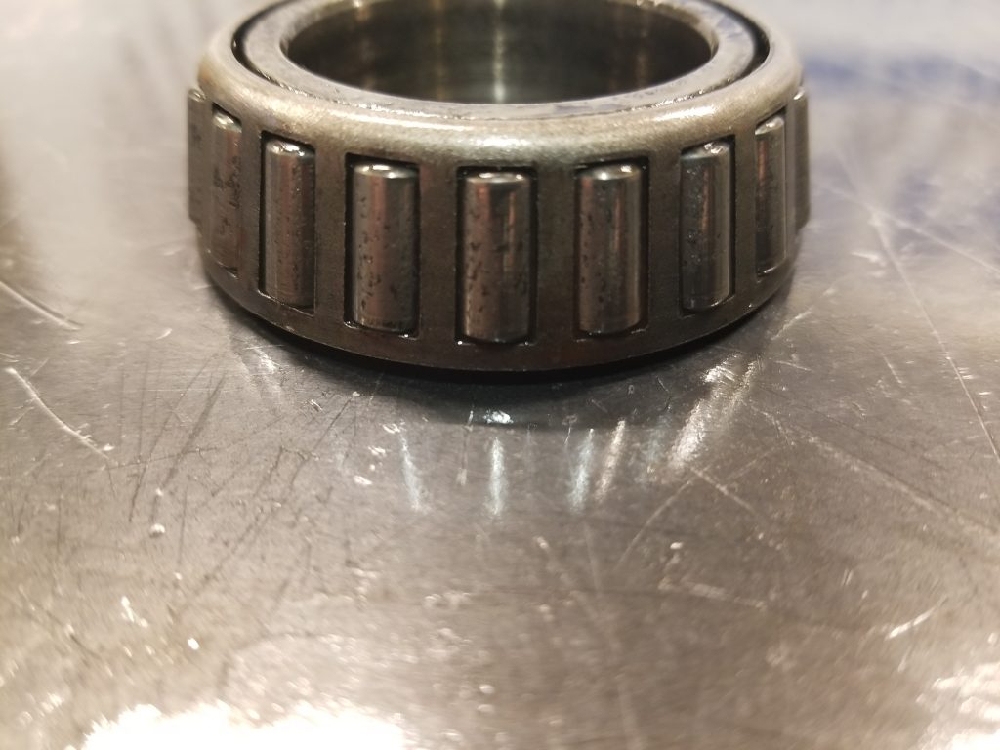
Recently we were rebuilding a transfer case that had already had a spool swap and it had WAY too much shim that ruined the bearings.

You can see the heavy pitting from this bearing be over-loaded.

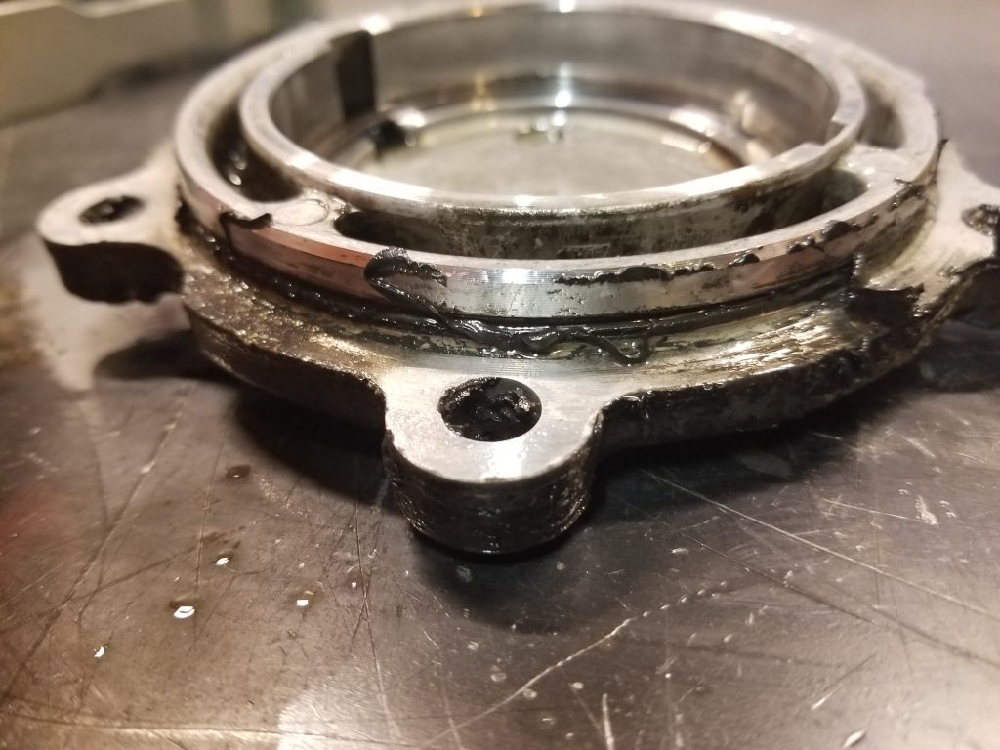
We found a few other problems and short cuts taken by the previous rebuilder. The side cover oring was replaced with just RTV instead of using the OEM Mitsubishi Recall Kit we do for each t-case rebuild, which includes new o-rings.

The lack of o-rings here shows a lack of detail and parts availability that may lead to leaks. 

At Rvenge Performance we pride ourselves on specializing in rebuilding 3000GT and Dodge Stealth 5 and 6 Speed Transmissions and T-cases and maintain a large inventory of the RIGHT parts to rebuild your important driveline components.

3000GT Radiator – Aluminum Performance Koyo Installation Guide

NOTE: The part featured below has since been discontinued by the manufacturer.

We recommend the following as a replacement:

Mishimoto 91-99 Mitsubishi 3000GT Turbo Manual Aluminum Radiator

Let’s face it, if you have a 3000GT or Dodge Stealth you have an engine that produces a lot of heat. You also have a car that could be almost 30 years old, with a 30 year old radiator.

Combine a 30 year old radiator and our notoriously cramped engine bays, perhaps a front mount intercooler, and other upgrades and you have a recipe for overheating.

The original stock copper radiators were not bad units, but by now they are hardly even worth repairing. With the aluminum radiator options out there like the 3000GT / Dodge Stealth Koyo Radiator that practically drop into place, replacing your old corroded, dirty, or leaking radiator is a no brainer.

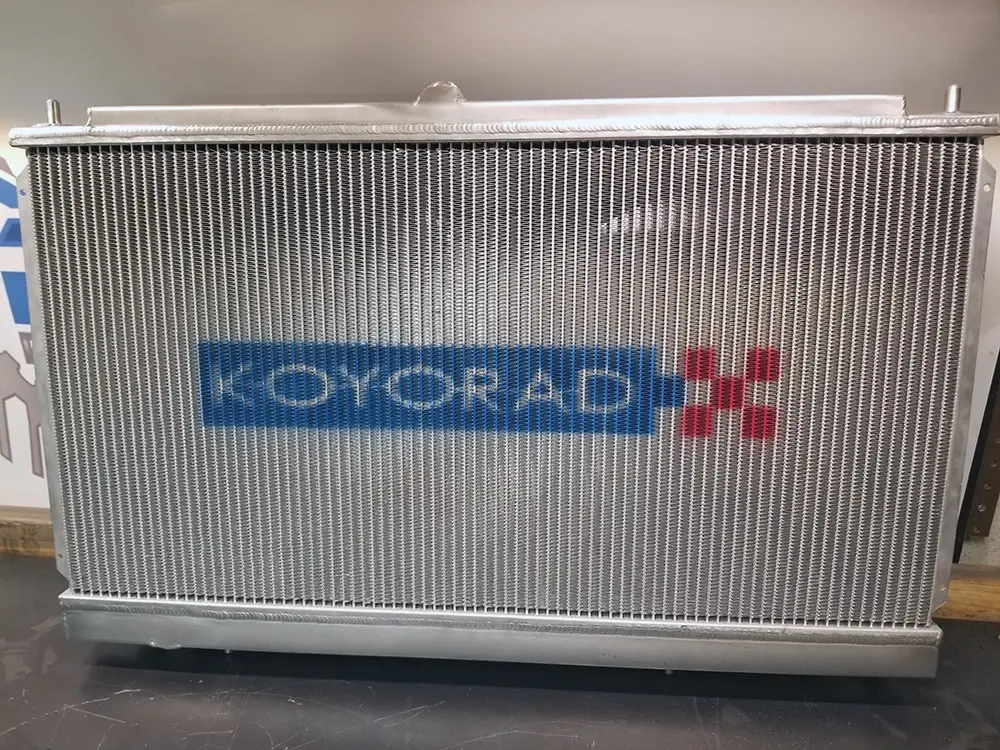
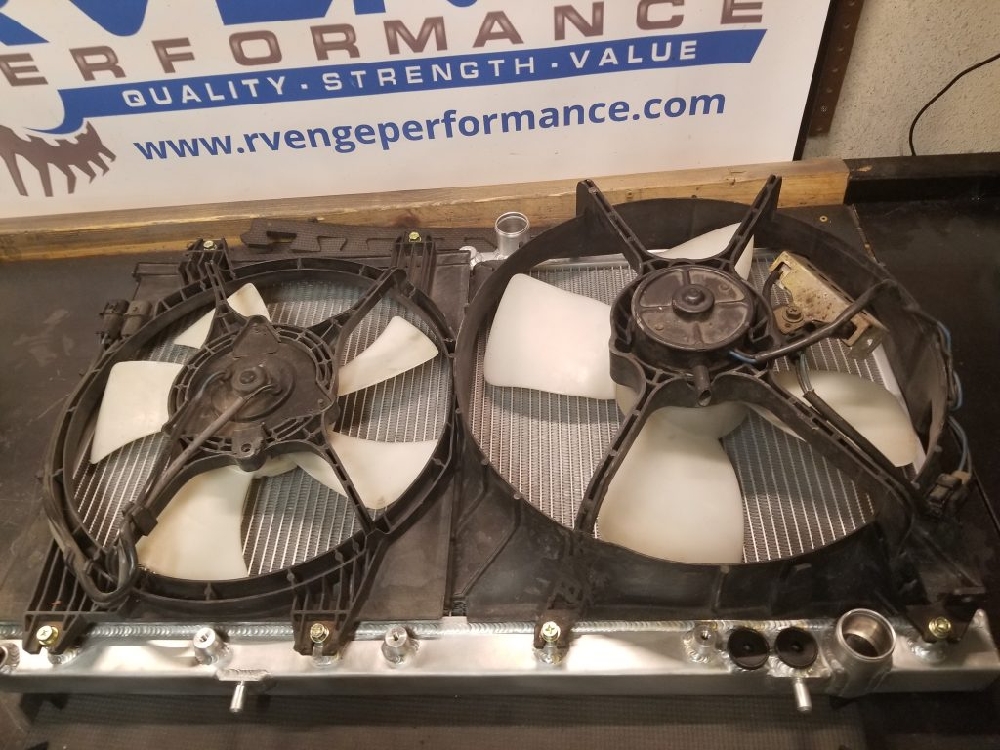
The Koyo 3/S Radiator is designed to utilize the stock radiator hoses, and has all the bolt bosses for the stock fans.

The Koyo radiator for the 3000GT or Dodge Stealth is a high capacity unit and includes all mounting points for the stock fans, new bolts for the fans, and threaded bosses for 1st Generation fan temperature switches if needed. This fan fits all manual transmission 91-99 3000GT and Dodge Stealths.

The Koyo radiator drops right into place, but will require some care and attention and some modifications to your stock upper radiator brackets.

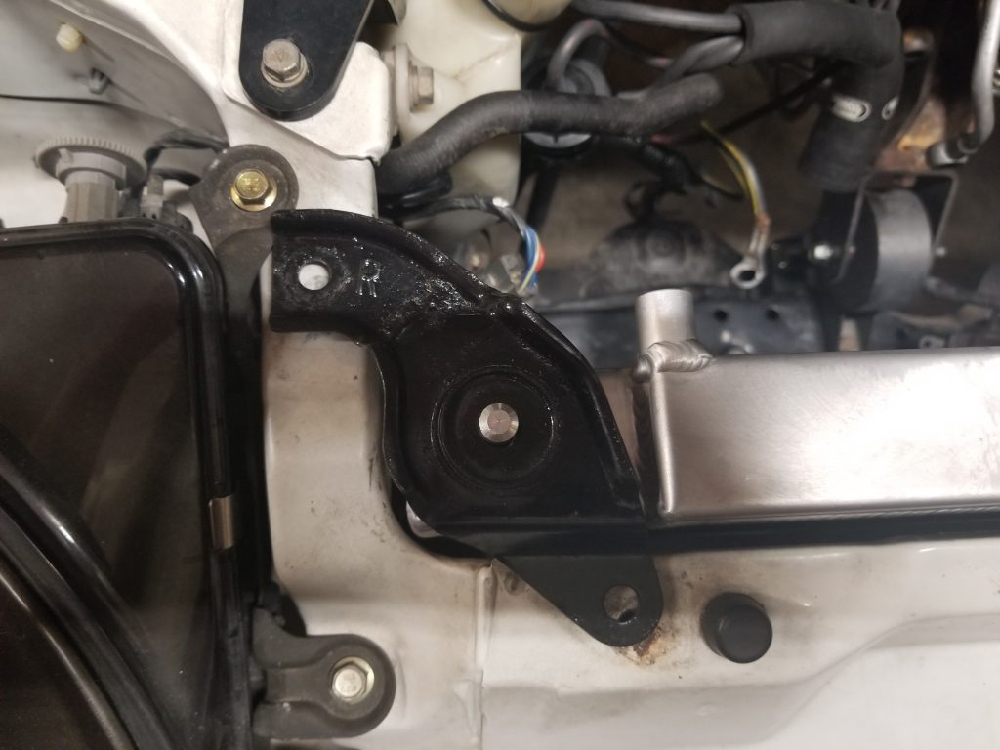
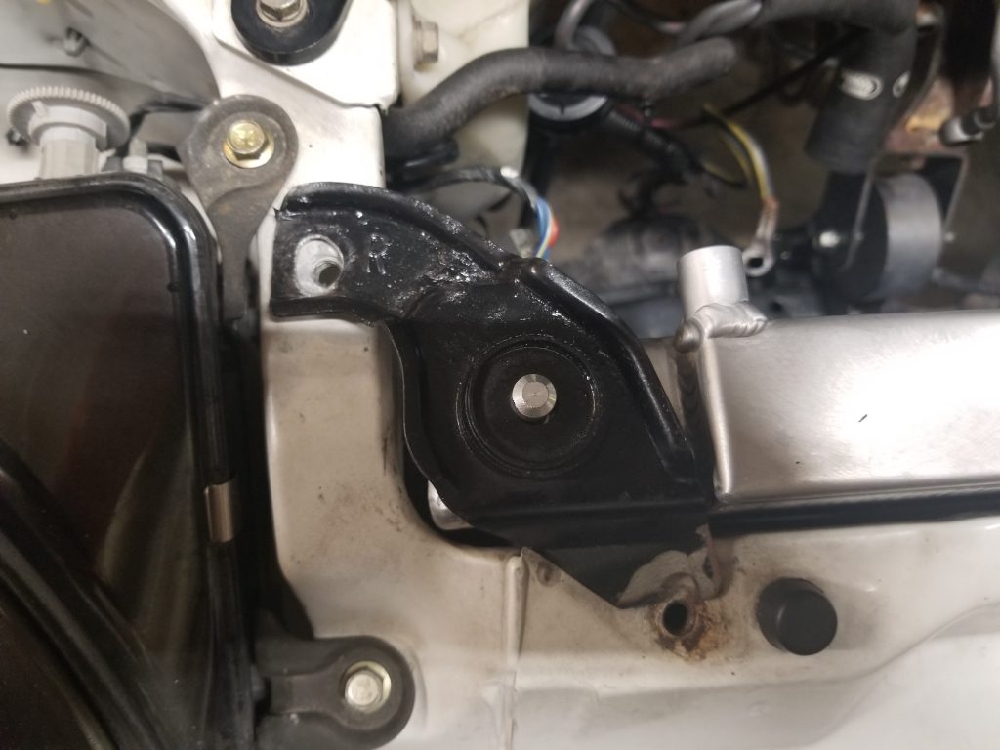
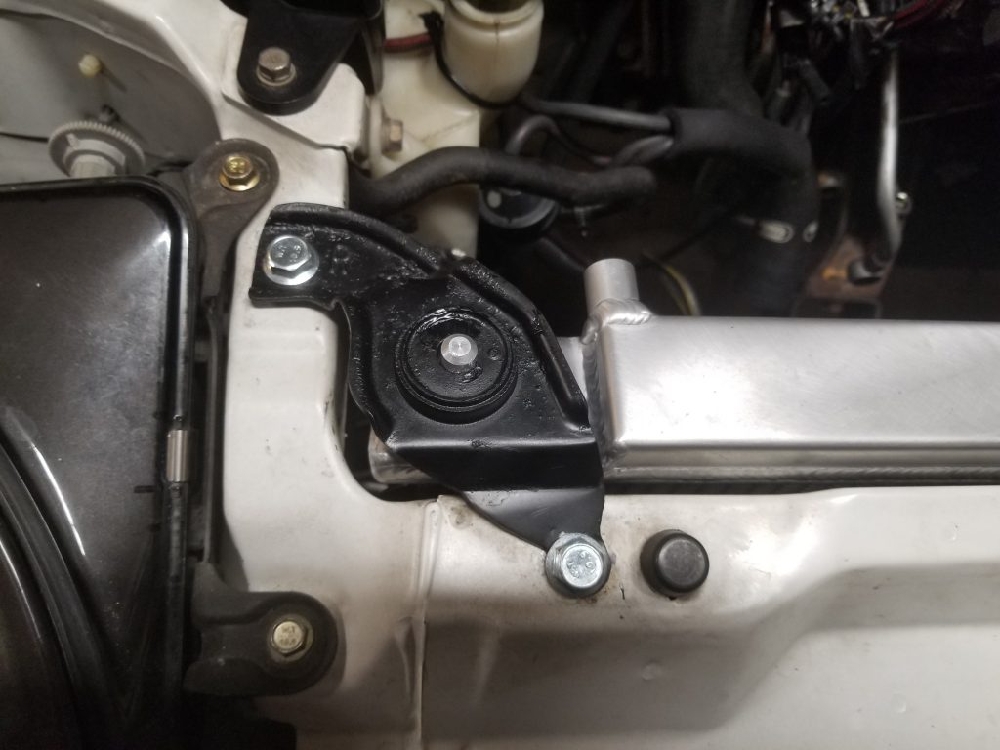
As shown the stock radiator brackets do not quite line up with the thicker than stock radiator.

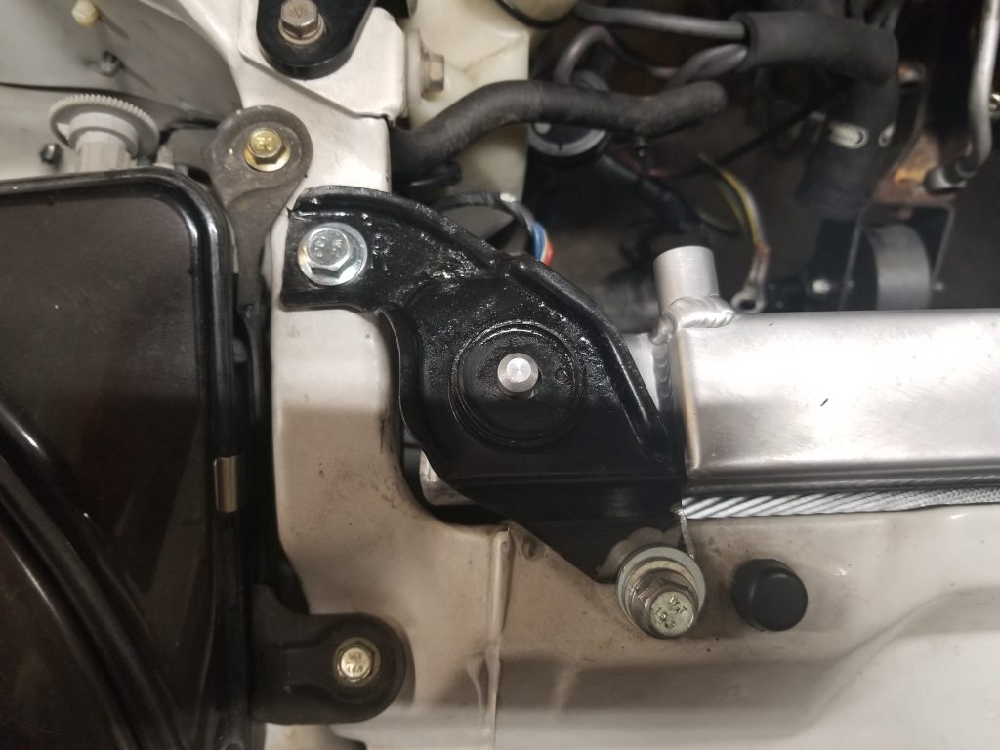
The stock radiator brackets are very strong and attractive. For the most basic install you can enlarge the hole near the headlight and cut the bottom hole open.

Once the bolts are installed and a little paint added the modification is hard to notice and the brackets are strong and secure.

If you can weld and want to go a little further a washer can be welded to the stock bracket for an even better fit.

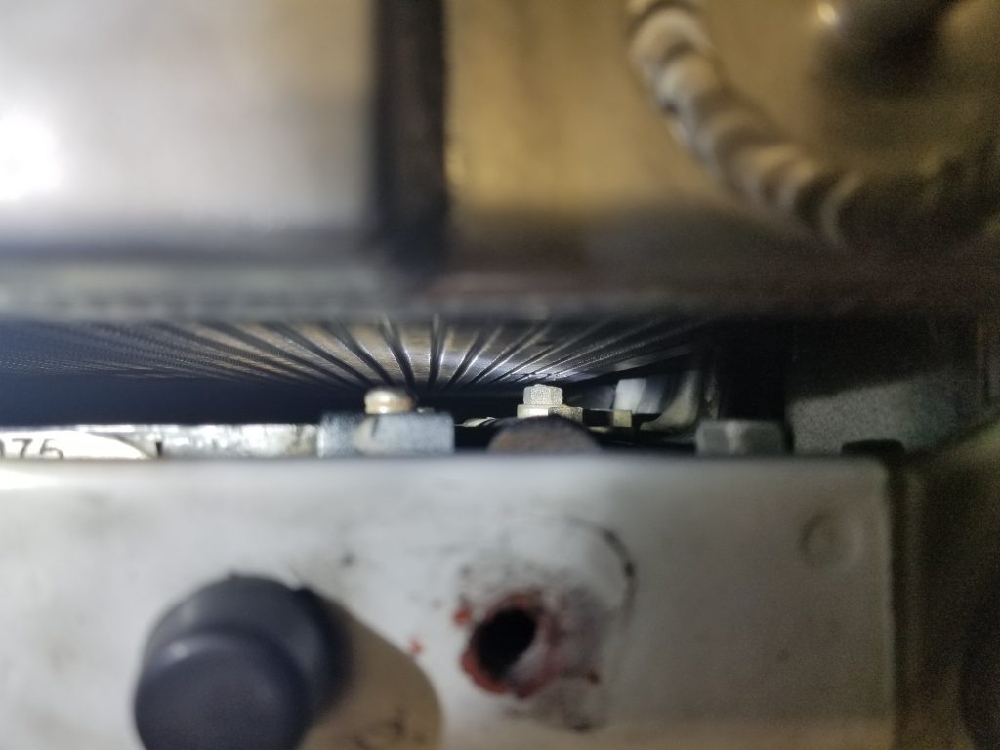
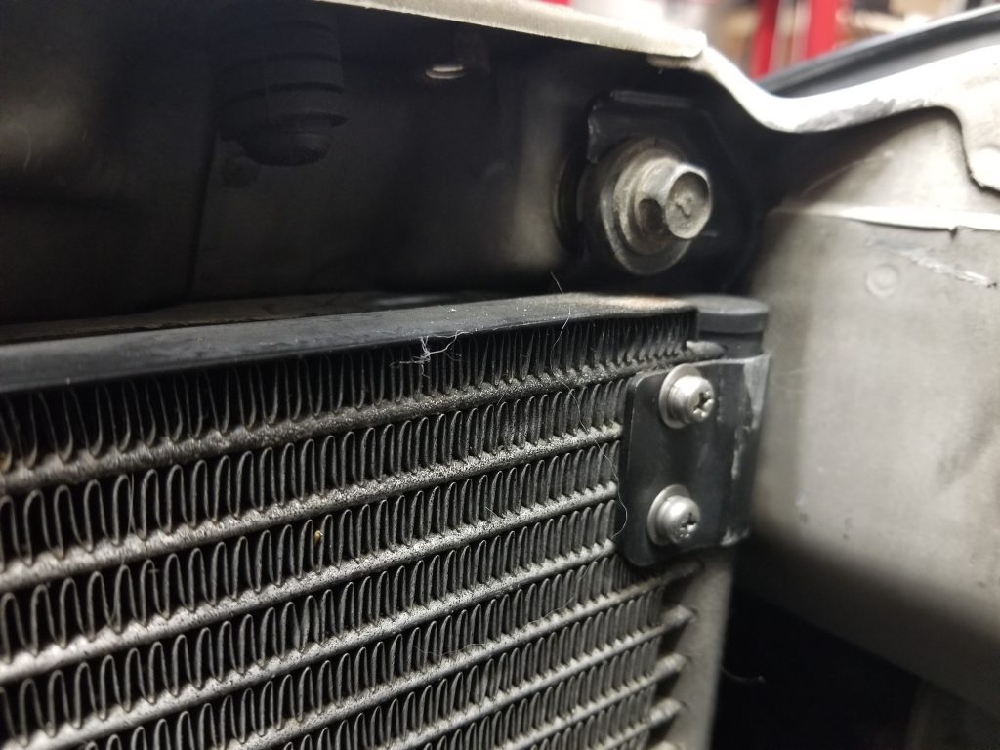
Another area to be careful with is there is a bolt or stud (depending on generation) that holds the A/C lines to the condenser. It is very important that this bolt is not touching the radiator. It may require cutting the stud off or grinding the nut.

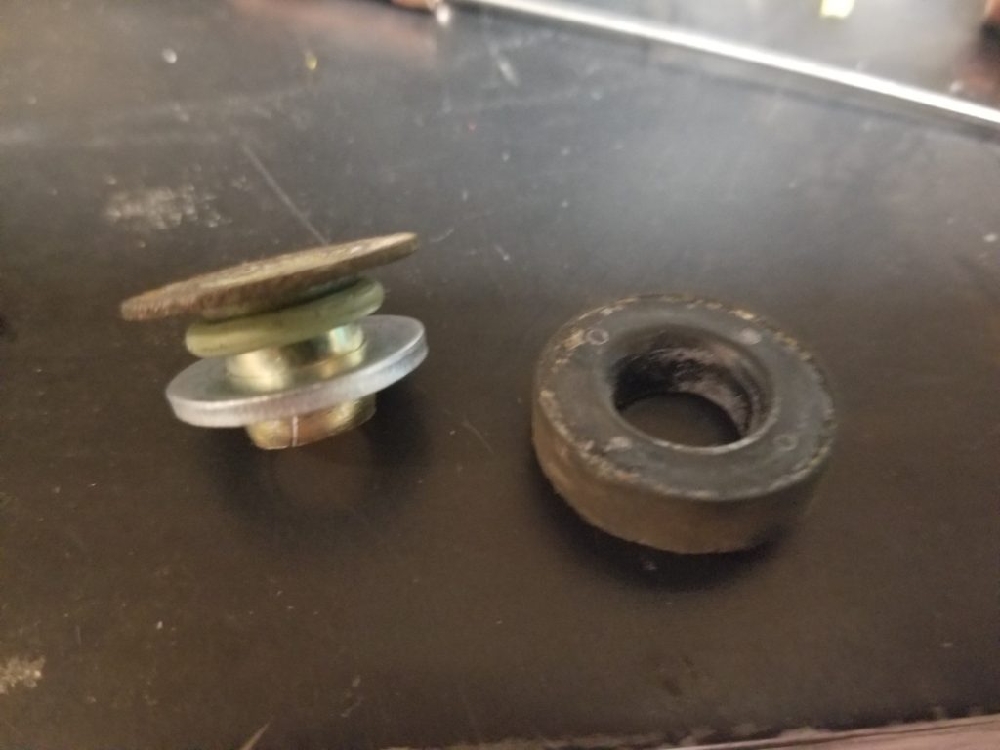
The other option if you want to mount the radiator as far forward as possible (for turbo or fan clearance) is to modify the bushings the condenser bolts go through.

You can easily remove half of the rubber bushing and replace with a small o-ring and a washer. This will gain you are least 1/16″, which can be just enough to clear the condenser bolt/stud head.

The final install is REALLY nice and will cool better than your old stock unit!

We hope you enjoyed our article on installing the Koyo Radiator.

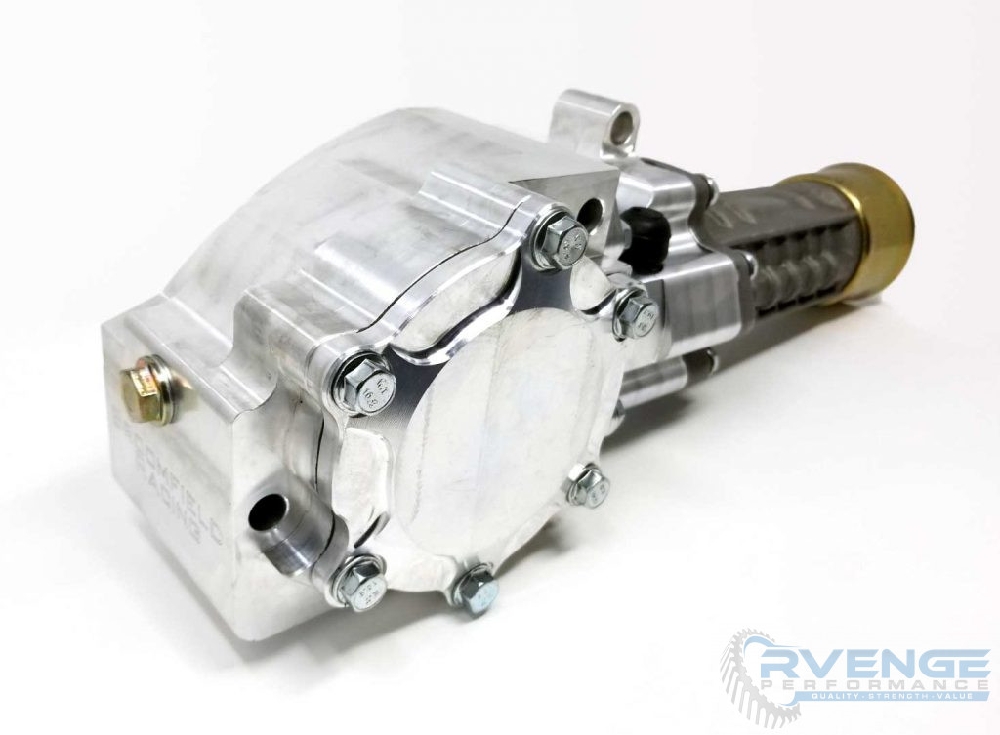
3000GT Billet Transfer Case Build

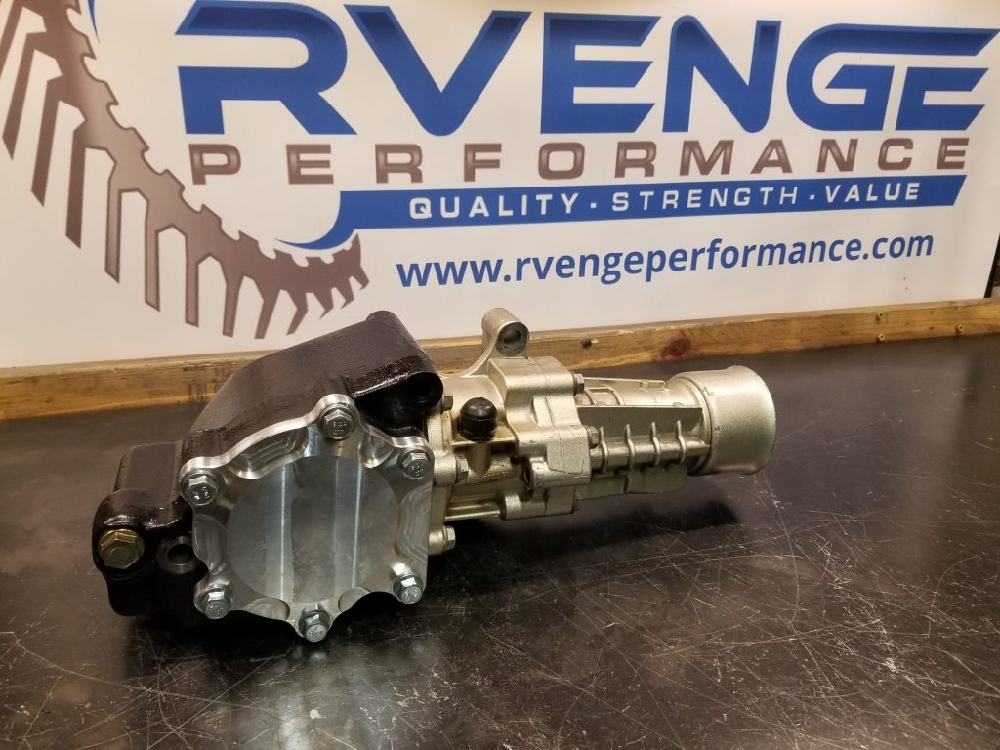
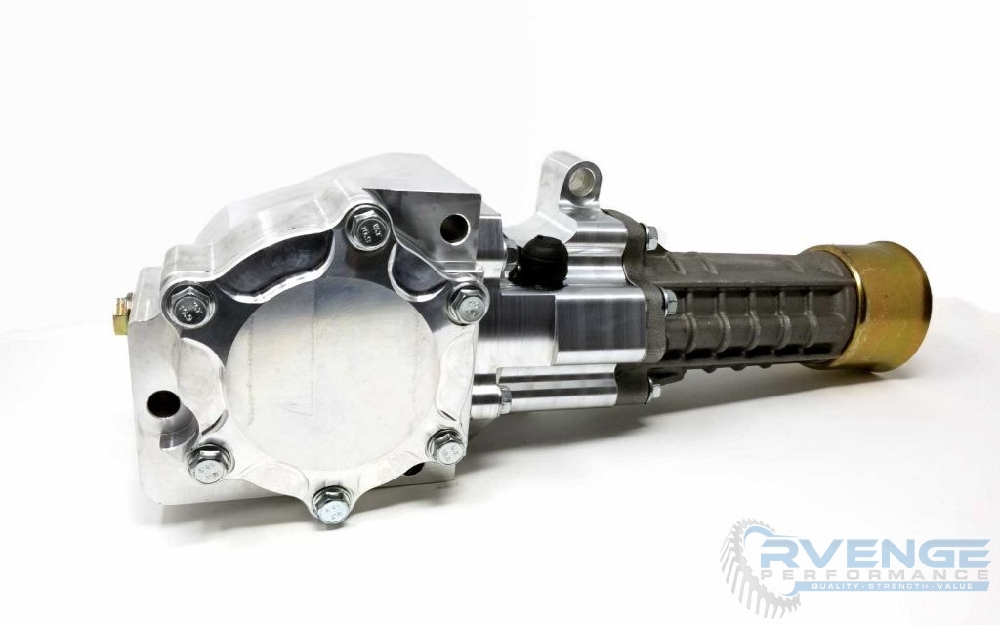
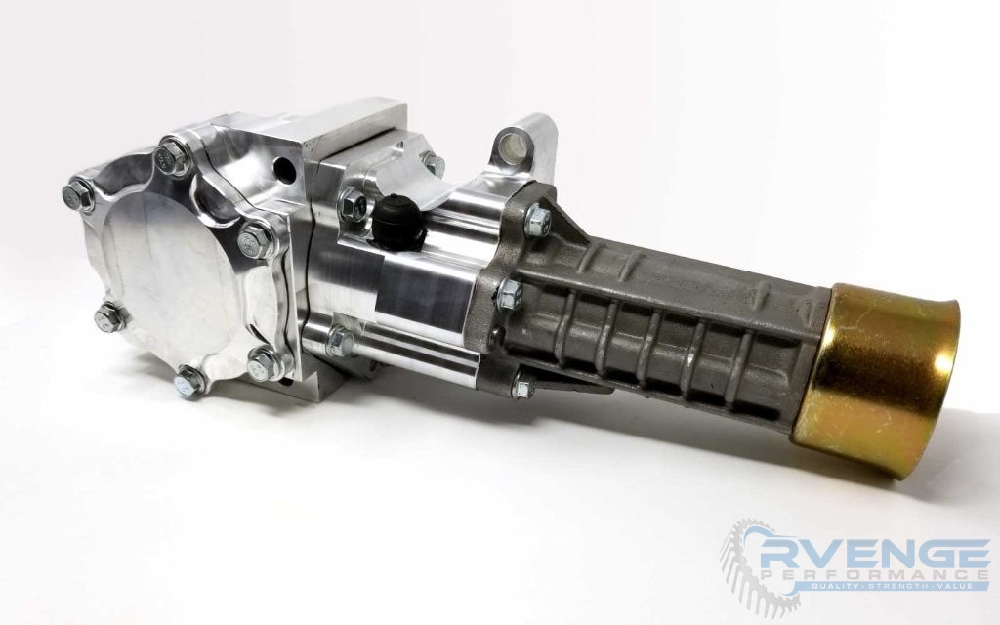
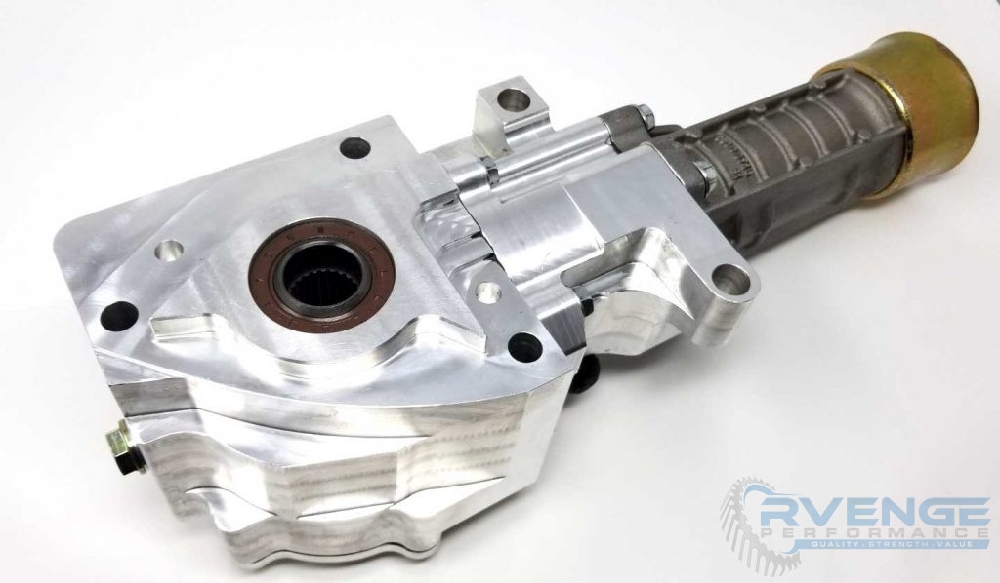
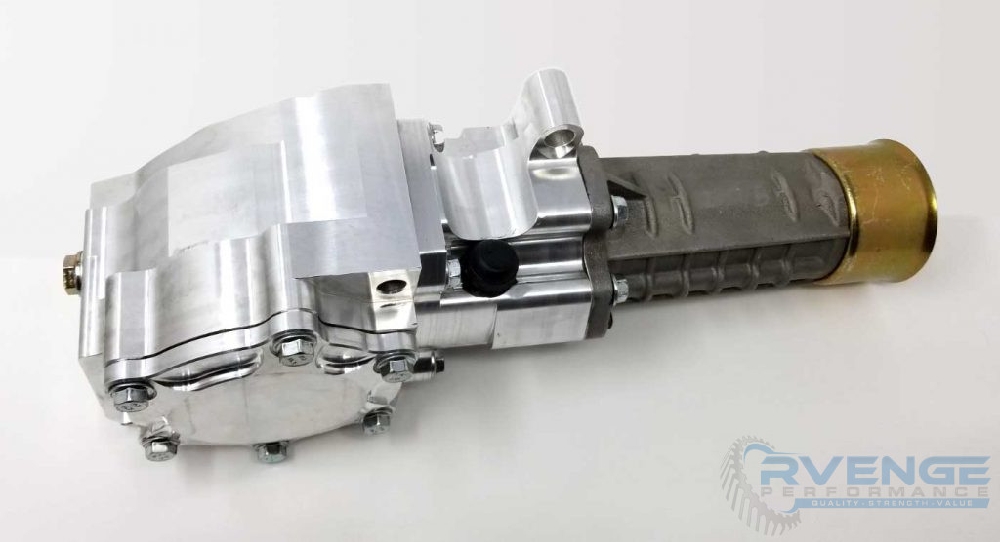
We love to have the opportunity to build transfer cases from stock to maximum effort builds like this, but this unit came out so good we had to share!

This 5 speed 3000GT transfer case build has the following:

  • Full Rvenge Performance 3000GT Transfercase Rebuild Service
  • REM Treated Gears
  • Broomfield Racing Billet Case
  • Vipershark Billet Side Cover
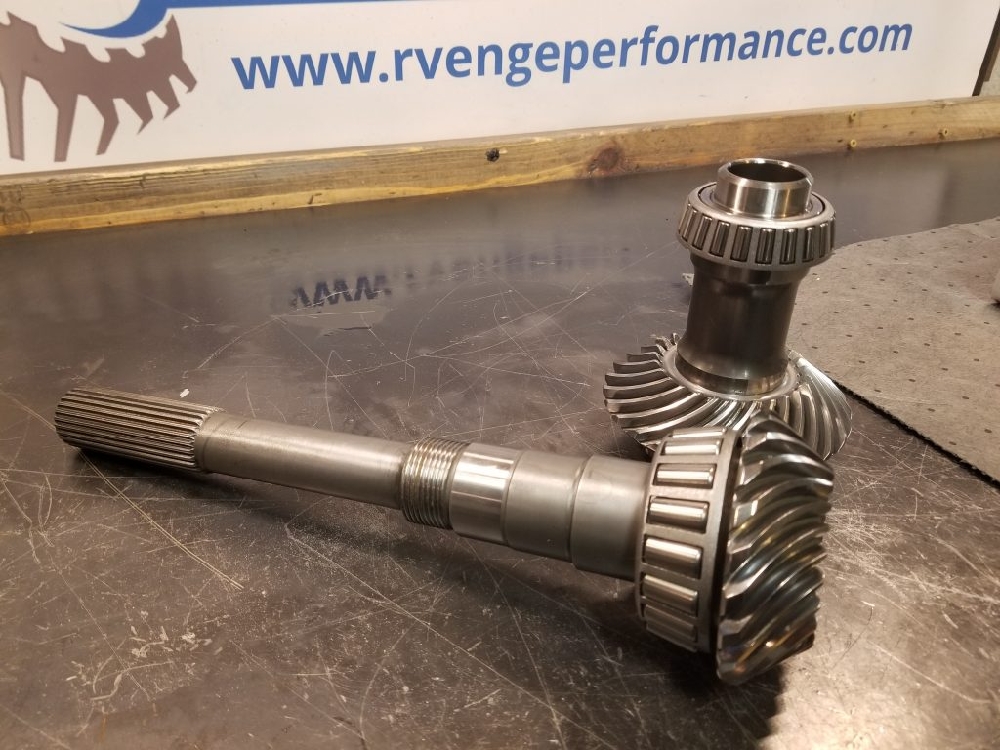
  • Hardened Input Spool
  • New OEM Seal kit
  • Built from a new OEM t-case
  • Gear backlash, bearing pre-loads, and gear mesh all set for long life and maximum strength.
  • New Grade 10.9 Bolts.

We hope you enjoy the pictures!


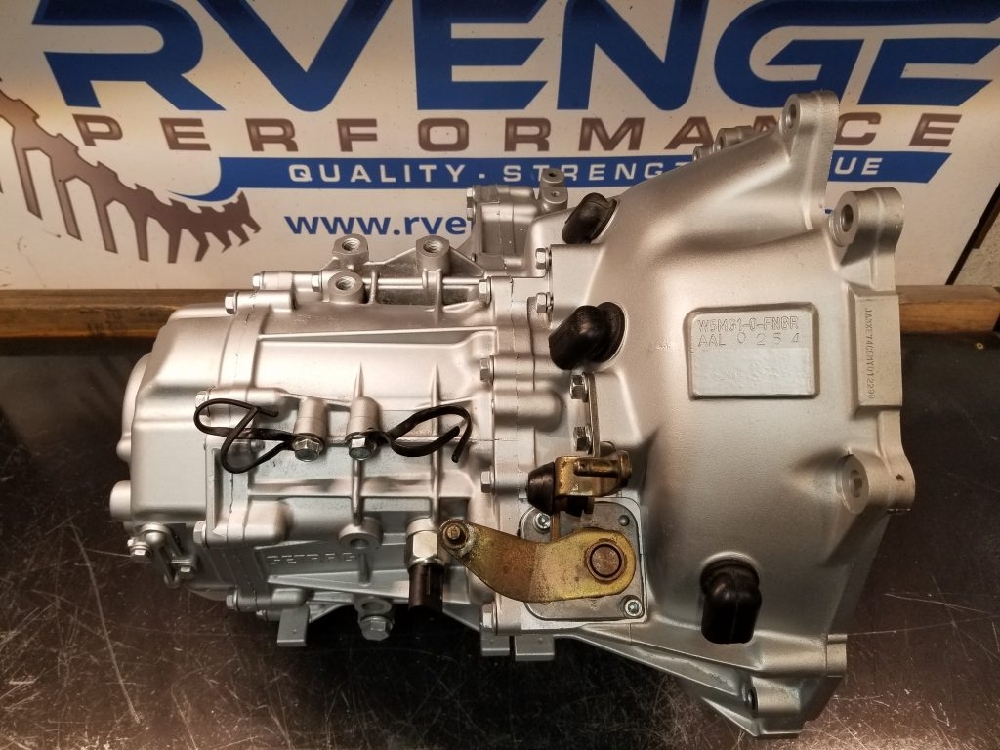
5 Speed 3000GT VR4 Getrag Transmission Rebuild Results

This unit needed some love when we received it, but its fully equipped now! We really enjoy rebuilding these AWD units for the 3000GT and Dodge Stealth turbos!

  • 300M Output shaft
  • New OEM Synchros
  • New Seals
  • New Bearings
  • Fully cleaned
  • All bearing pre-loads reset
  • New 1/2 Hub and Slider
  • New shifter bushing block
  • New fill and drain plugs
  • Fully rebuilt transfer case

Additional Fixes

We also were able to repair the very common damaged transmission mount bolt holes. They very often strip and we heli-coil repaired all three, so the end users will have fresh threads and no problem mounting the transmission. 

3000GT / Dodge Stealth Transmission Shift Fork Roll Pin Walk-Out

The 1/2 shift fork on both the 5 and 6 speed has a real habit of having the roll pin walk out. Issues from this can range from missing gears to engaging two gears at once, which can be catastrophic to say the least!

We loctite the pins in to help prevent this. The available 6 speed billet forks also help eliminate this because of reduced flex in the fork itself.

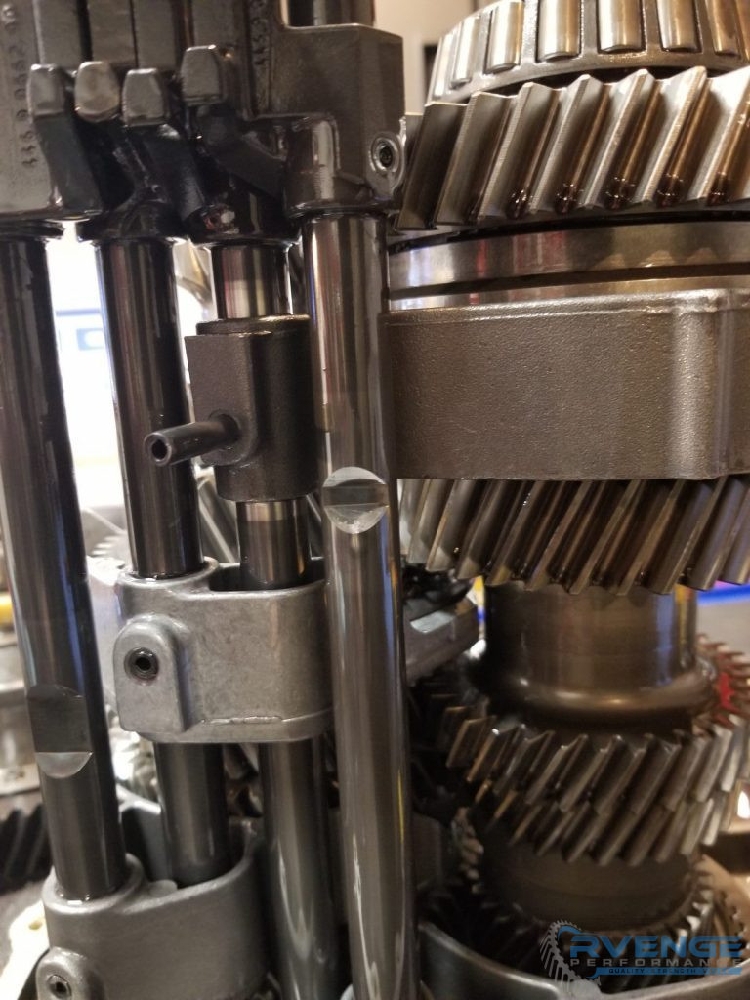
You can see the 1/2 shift fork roll pin has nearly fallen out and the fork has moved up and down on the rail, causing missing gears.

3000GT / Dodge Stealth High Impedance (EV14/USCAR) Fuel Injector Wiring & Resistor Bypass

Opening the box on a set of FIC 1000s High IMP 3000GT Injectors, pigtails included in the standard option.

The stock fuel injectors used in the 3000GT and Dodge Stealth Turbo platforms are an EV1 style injector with a Jetronic style fuel injector plug.

Many modern high impedance injectors (but not all, check your product descriptions carefully) utilize an EV14 style injector body (narrower) with an adapter hat to fit the 3/S fuel rails and a more modern Uscar electrical connector.

When swapping in these injectors you will need to wire in new connectors or pigtails into your stock harness and eliminate the fuel injector resistor pack. We are going to detail the process for both requirements.

The benefits to this swap include a much more modern injector, which will allow you to run larger injectors than previously possible, while still maintaining excellent idle and cruise and replacing your old and crusty fuel injector wiring. Additionally the stock wire connector utilize a spring clip to hold them in, which is a pain to work with and easily lost. Modern pigtails have a push button for an easy release and no chance of losing anything.

3000GT Fuel Injector Wiring Facts

  • The rear harness is a subharness that is easily removed.
  • The front is integral to the main wiring harness.
  • The fuel injector wiring is very old and corroded by now and will not take to solder well.
  • The stock wire connectors use spring clips that must be removed with a pick and are easy to lose and easy to break the connector.
  • The 3000GT and Stealth Turbo platforms use a 7 wire resistor pack on the firewall near the windshield wiper motor to reduce the voltage to the stock low impedance injectors. This must be bypassed or your high impedance injectors will not function.

Rear Injector Harness

We will start with the rear harness as its easy to disconnect once the plenum is removed and take the whole sub harness to the bench.

First remove the plenum, you can see the 3 fuel injector connectors (red/brown) in the rear and the subharness connection is on the little 3 plug metal bracket on the left.

Once you removed the rear subharness start by stripping off the outer sheath from the wiring.

Lay out your new pigtail next to the old wire to determine where to cut. The old harness will be brittle and corroded, so use as much of the new one as you can.

Strip the wires once you are happy with the length. Automatic wire strippers are very helpful for this. Note how corroded and dark the stock wire is.

Its tempting to use solder and heat shrink tubing and that will usually work, but as corroded as the old wiring is, its actually better to use high quality insulated heat shrink crimps as shown. Solder can also crack and make joints brittle, so can break in hard motorsports use. The polarity doesn’t matter, so don’t worry about mixing up the wires.

Carefully wrap up the wire in high temp electrical tap such as Scotch Super 33+

Repeat the process for the 2nd connector.

The completed subharness, ready for installation in the rear bank.

The rear sub harness installed.

Front Harness

The front harness is a little trickier because it is integral to the engine harness, so all your work must be done on the engine. It is also hidden inside a plastic tray. If you want to keep this you need to be careful taking the tray apart.

After flipping the front tray over pop it apart carefully with a screwdriver.

After you remove the front harness it looks like this. Repeat the process you did for the rear plugs on the front.

Carefully place the new harness into the plastic channel and snap the bottom on.

The front wiring installed and the injectors in place.

Resistor Pack

Once you have the injector pigtails done and the injectors installed you can now bypass the resistor pack.

The resistor pack on the firewall. Remove the 2 10mm headed bolts and the plug.

The resistor pack. You will need to cut the plug off with a little wire to spare.

You will need to strip all seven and connect them all to each other. This is a case where solder may work best, particularly as these are very short and not subject to much movement. Make sure to use a lot of heat to get the solder to wick properly.

Conclusion

Your car is now ready for modern injectors that will give you trouble free and safe performance with your new wiring connectors.

3000GT VR4 & Dodge Stealth Transfer Case Seal Installation Guide

After many years the Stealth or 3000GT VR4 transfer case seals begin to leak, this happened so often there was a safety recall in the 2000s to address the issue. The dealership would replace your seals and inspect your transfer case to see if it needed replaced completely.

The recall has finally expired and very few, if any dealerships are still doing this. As part of our transfer case rebuild service we replace all the seals in the transfer, but some customer may elect to buy just the seal kit and tackle this themselves if their unit does not need a rebuild.

Its fairly straight forward to install the seals, but there are a few tips and tricks that make it easier. It is easier to install these if you remove the side cover and tap on the spool to knock out the gear inside. This also gives you a chance to replace the sealant on the side cover with a high quality RTV, like the “Right Stuff” from permatex. Below you will find some helpful steps if you read the captions.

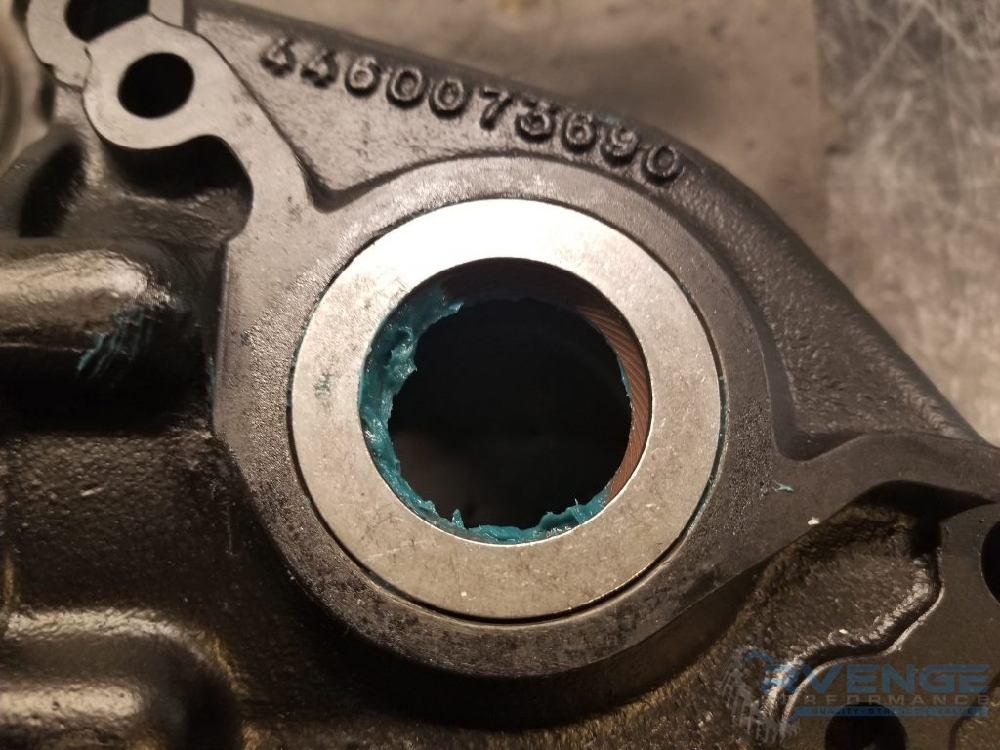
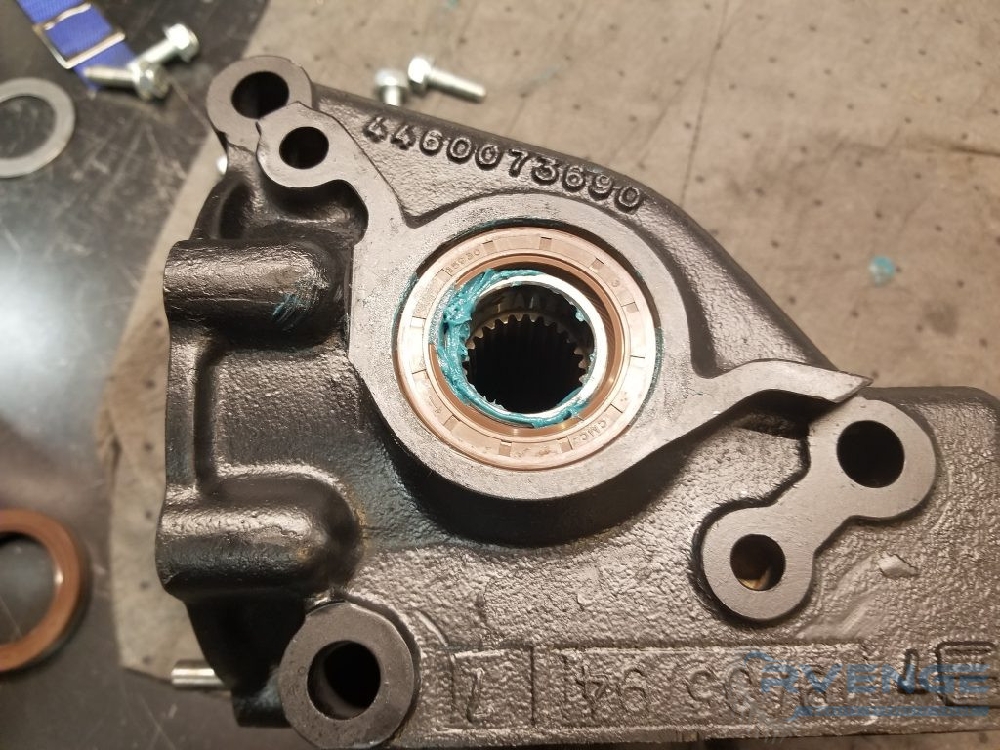
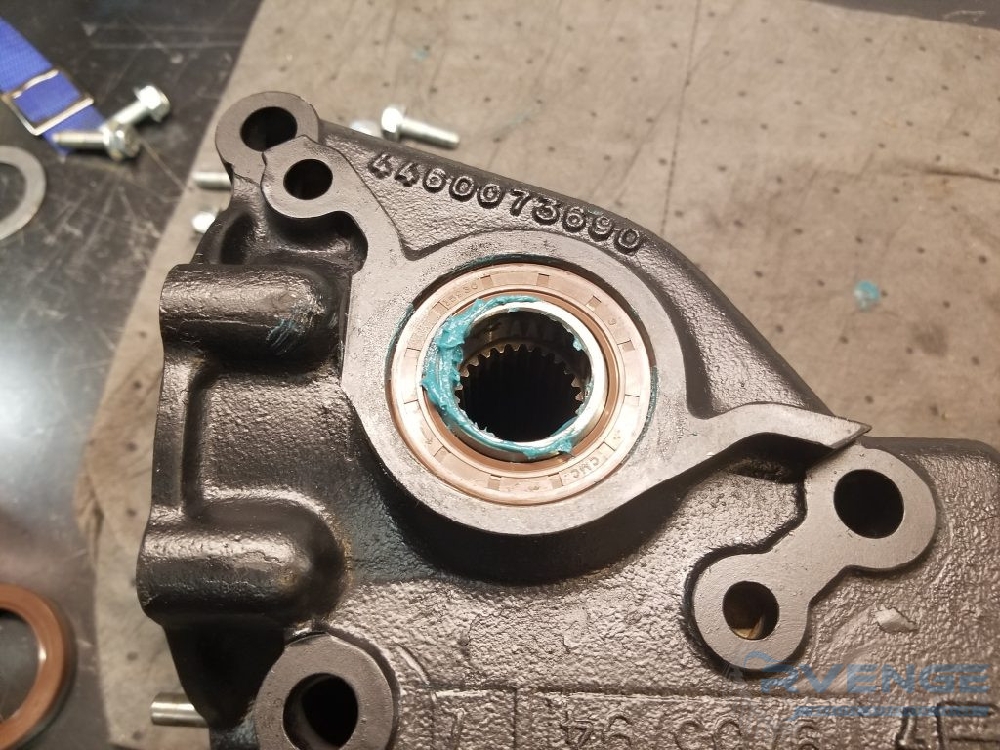
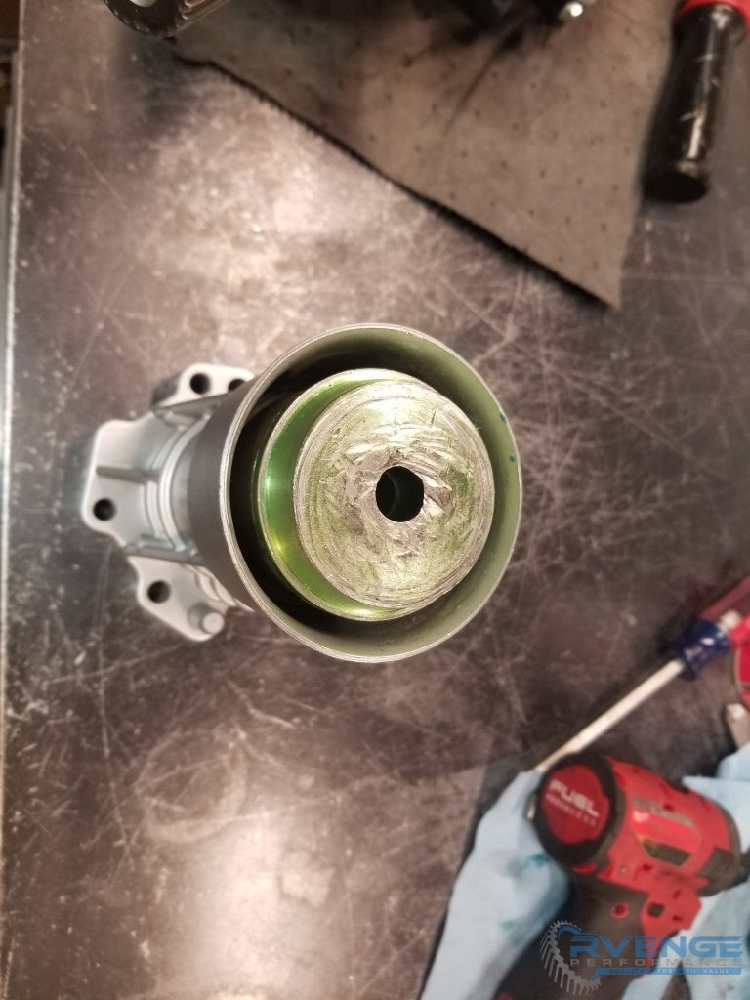
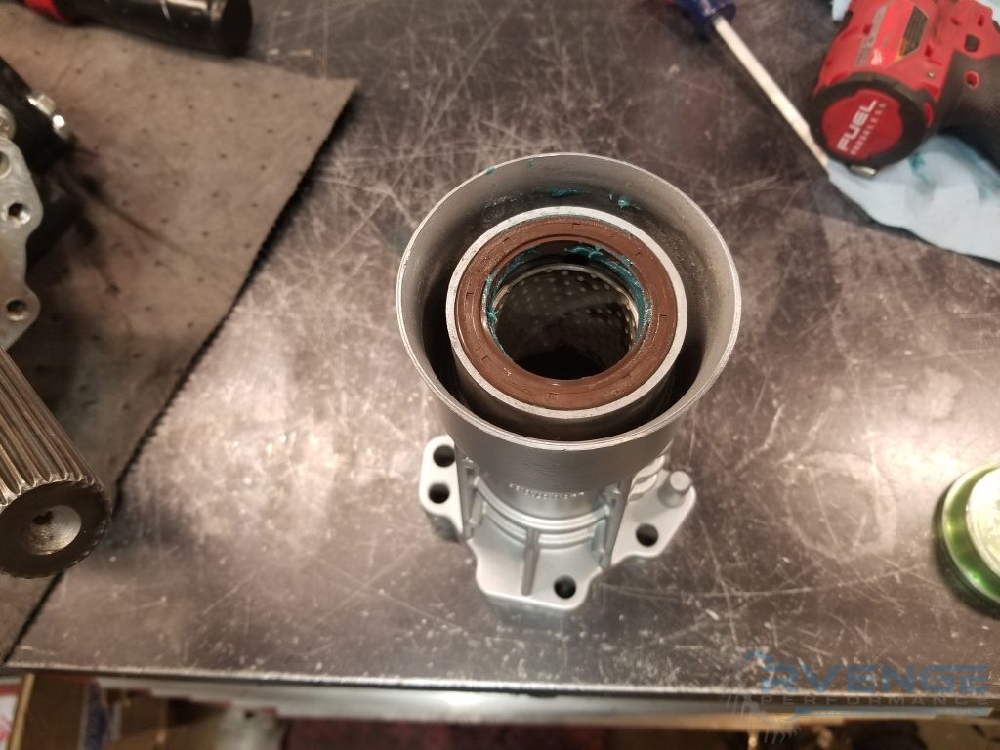
The stock seal has been removed, then we knocked out the gear and side cover off after removing the 6 13mm headed bolts. Now grease the inside of the seal and use a seal driver or similar tool as shown above to drive the seal flush with the housing.

The OEM recall kit, which is no longer available contained a spacer washer to drive the seal deeper into the housing. If this is not done it will cause leaks or even the seal to pop out. You don’t need the washer, but its important to know how deep to drive it.

The spacer washer is approximately a tenth of an inch.

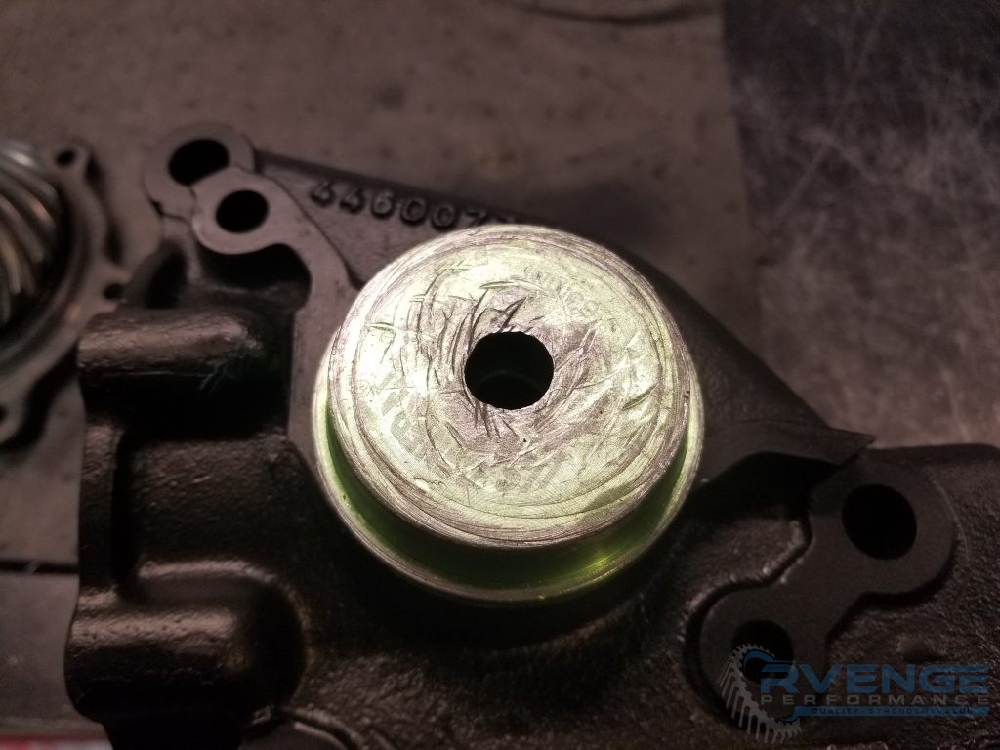
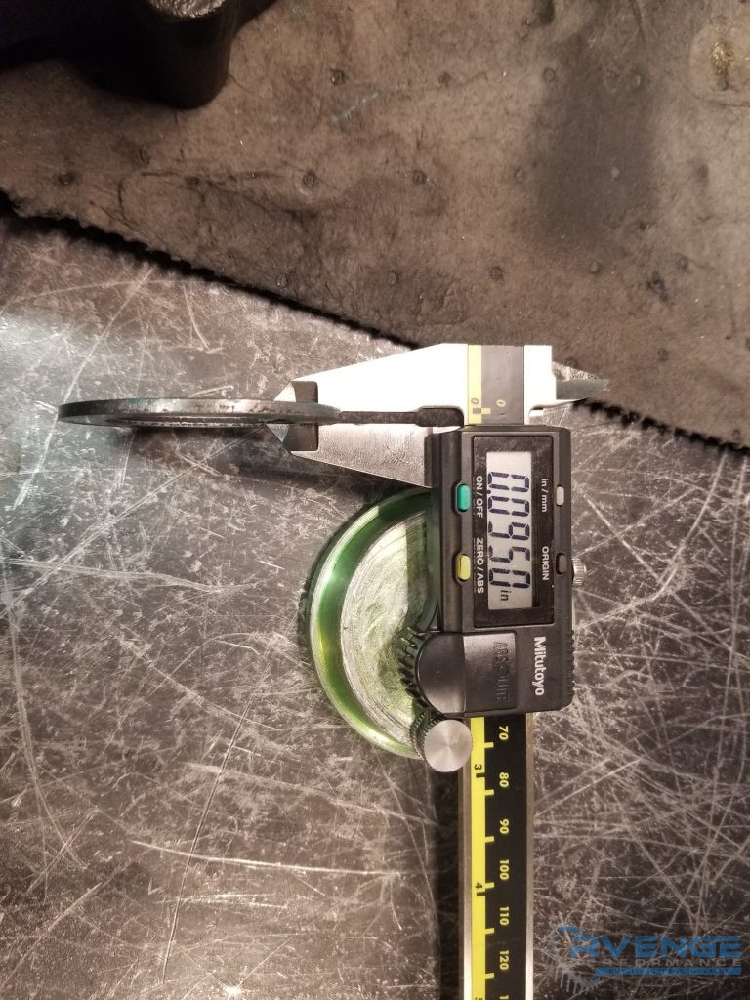
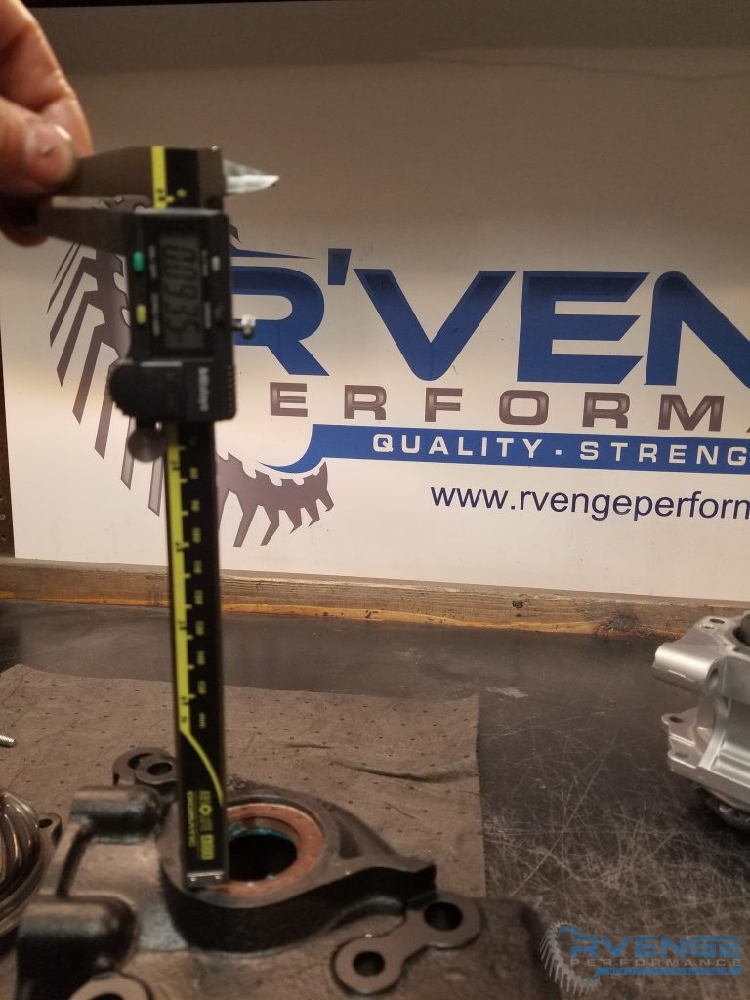
The seal must be driven into the housing, Shown here the depth is slightly over .9 inches. Ultra precision is not important, but get as close as you can.

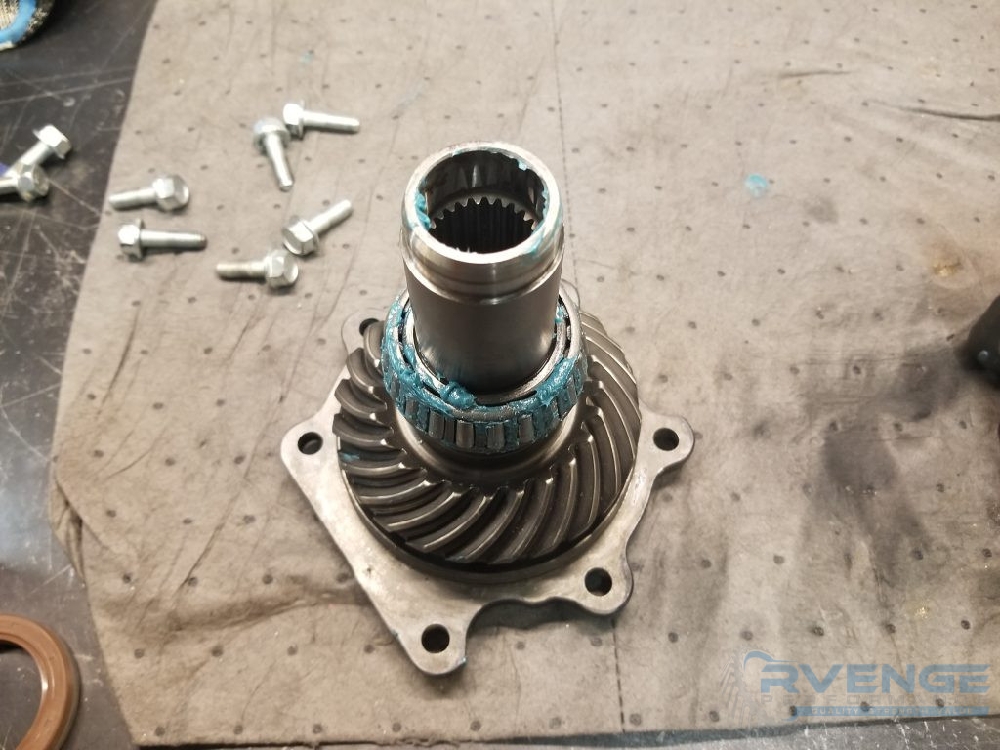
Then place the spool gear in the side cover and slide the case down over it. This helps center the spool in the seal and prevents damage. If you slide it in from the side it can be hard to get it started in the seal and you may knock out the garter spring.

Gently push down and get the seal started, then flip it over, holding the spool gear in and shove it the rest of the way into the seal. You may need to run a small screwdriver around the inside diameter of the seal to get it to slide over the spool. Some spools are tapered more than others.

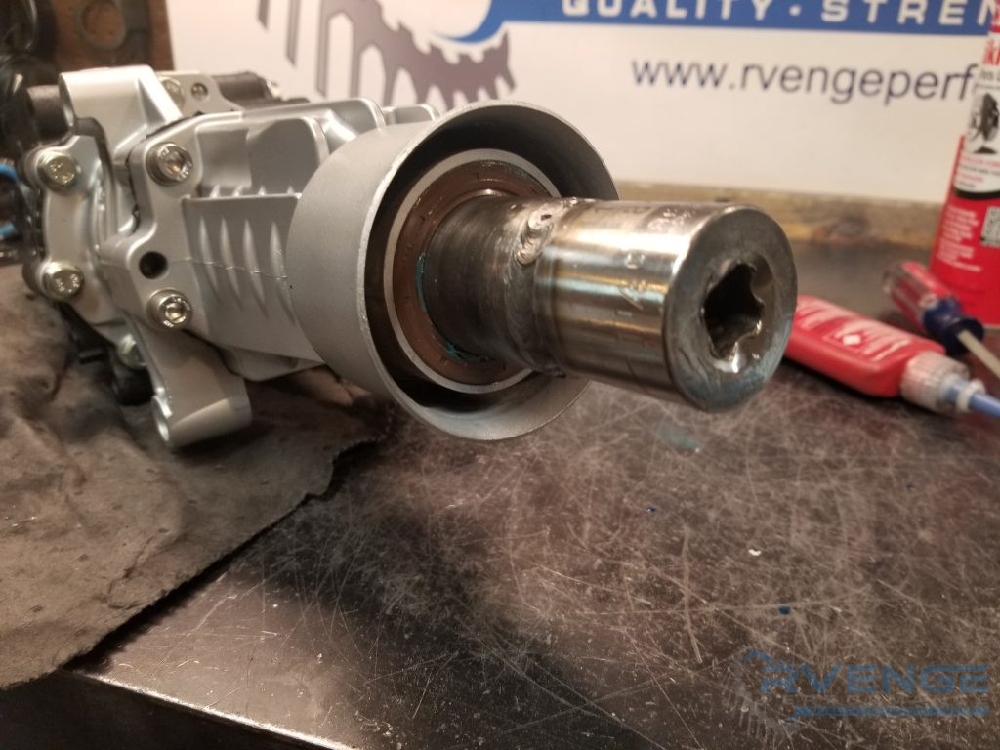
The tailshaft seal is easier. Use another bearing/seal driver to push it flush to inside of the tailshaft. If you are doing this on a fully assembled case you may need to use a socket or similar. Grease the inside of the seal and tailshaft bushing. Inspect the tailshaft bushing. Some copper showing is not the end of the world, but very heavy wear will cause the new seal to leak as the driveshaft snout can move around.

Once reassembled we use a custom tool to verify everything slips in easily, but you can do the same thing when installing your driveshaft. It should slide in without much effort.

Conclusion

We hope this has been helpful. Install your t-case, fill it with fluid and go for a drive, check for leaks upon return. You should get many years of service out of your new seals.

3000GT VR4 / Dodge Stealth AWD Transfer Case Input Spool Replacement

The input spool on the 3000GT / Stealth AWD Getrag transmission/transfer case setup (W5MG1 / W6MG1) is very prone to corrosion and spline wear. Anytime the transfer case is removed the splines should be cleaned and have heavy grease applied to both the shaft coming out of the transmission (output shaft) and the splines inside the t-case, the spool as we call it.

For those that do not work on these units often it may be unclear what to press on and off, so we have produced a video showing this. Please note you NEED a 40 ton press or larger to do this SAFELY. Do not be tempted to use a small 20 ton imported unit as they can actually bend and cause injury or property damage.

For those without the pressing capabilities we offer our transfer case spool pressing service and our full t-case rebuild service.

Please note the transfer cases on these cars are basically small rear ends and need to have their bearing pre-load reset anytime components are replaced. New spools can be tighter or looser and require adjusting the shim underneath the bearing race nearest the seal that faces the transmission. They also need the backlash and pinion depth verified or you may have clunking, whining, or other issues.

AEM Series 2 Standalone EMS Battery Offset / Latency Setup

Battery Offset / Latency

Every fuel injector has an amount of time it mechanically takes to get the injector off its internal seat and begin flowing fuel. This is often known as the latency of the injector or the battery offset. This are additive values to all of your calculated fuel injector pulses. At low loads these can be a large percentage of your fuel injector pulsewidth, so its important to get these correct for good idle and cruise.

The battery voltage at the injector will affect the speed at which its internal coil is able to operate the mechanical parts and thus a 2d table is needed to have a different battery offset for each voltage range.

The AEM Setup wizard has battery offsets for some popular injectors, but as time goes by more and more injectors are made and the wizard will become out of date.

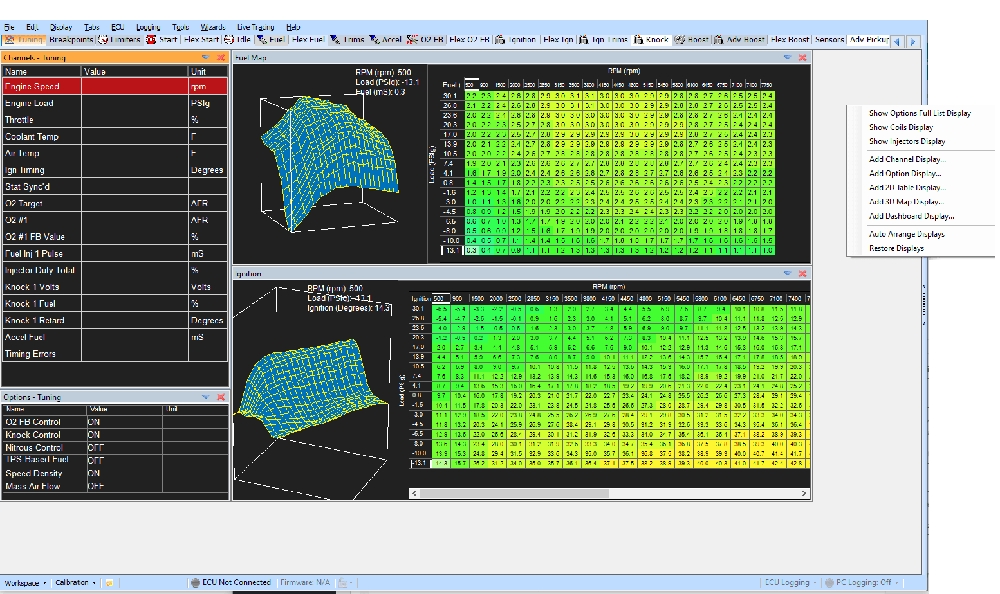
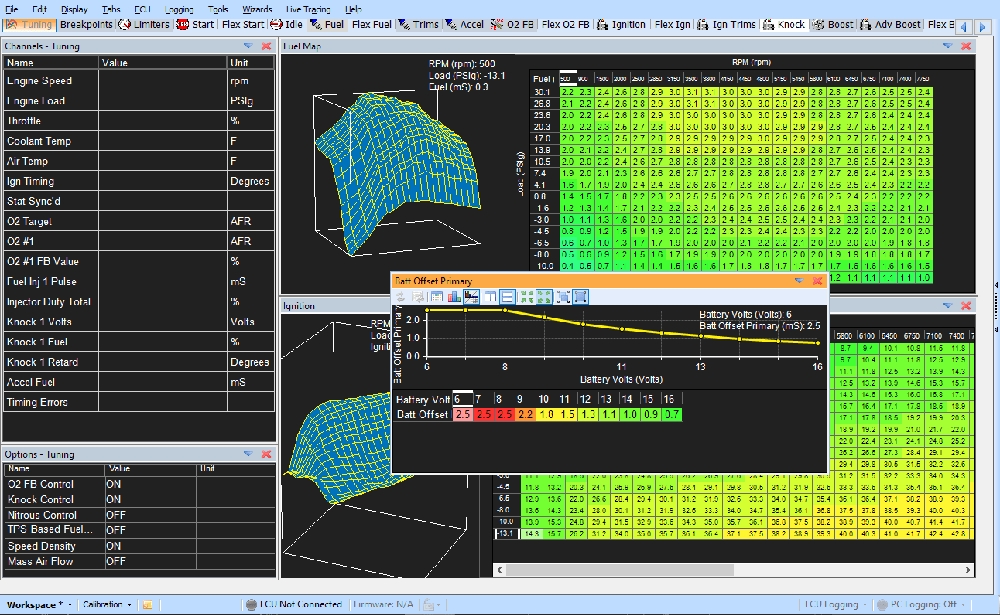
It is therefore important to be able to set these manually. AEM provides an option for this in Aemtuner, but you will have to add the 2d table display for batt offset primary to your workspace. 

Right Click an Open Area in your AEMTUNER workspace.

Now Click Add 2D Table and select Batt Offset Primary from the List

You will be presented with a box where you can enter the values from your injector data sheet. In this example we have the values from our FIC 1650s
Interpolating

You may/will find that your injector sheet doesn’t have the same voltages as the aem table. Simple set the values for the columns you do have an then select the horizontal interpolation by right clicking and AEMTUNER will set appropriate values so you have a smooth slope.

Hopefully your charging system never hits some of the extremes, but it is best to fill in all the values you have. You may also find that 2.5 is the highest value allowed, if your injectors go higher than that just enter 2.5.

Conclusion

Once you have setup this table you are ready to proceed with other tuning. Each time you change your injectors you need to remember to go back through these steps. Please note that this will not change any of the injector flow tables, you should use the change injector flow/size wizard for that.[/vc_column_text][/vc_column][/vc_row]

Categories
Blog archive