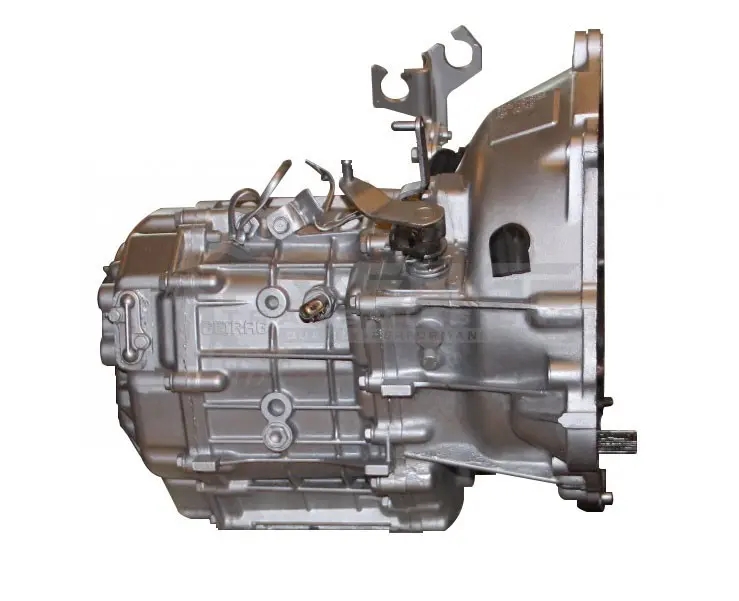
A 3000GT transmission rebuild or a Dodge Stealth transmission rebuild is an investment that you will want to protect. There are steps to take to be sure that your transmission rebuild lasts a long time and gives you a lot of joy, shifting the transmission for years to come.

Rebuilt 3000GT Transmission (5 Speed)
Installation Recommendations
A transmission or clutch swap may seem straightforward to many, but there are some things to watch out for.
General Transmission
Rebuild Installation Tips
We recommend picking up the trans from a hoist or engine bar from above, rather than using a transmission jack when possible. We find if you wrap a ratchet strap around the shifter cable brackets it almost perfectly balances the transmission as you lift it up to meet the engine.
On the 3000GT or Stealth six speed you may wish to undo the driver side motor mount and jack up the driver side of the engine as this will give you more angle down and make it easier for the transmission to clear the frame rail.
When the angle is correct the transmission will easily spline into the clutch. If you find yourself forcing it try a different angle and/or rotate the crankshaft using the crankshaft pulley and a 22 MM socket. If you force the trans into place or use bolts to draw it in you will damage the clutch and input shaft, causing poor release.
Clutch Care
The #1 problem that can affect the success of any transmission installation is the proper function of the clutch. If the clutch is in poor condition or the transmission is allowed to hang by the splines during installation then the car can suffer from poor clutch release. This will cause the synchros to be completely overworked and they will rapidly burn up.
If you are installing a new transmission it is a great idea to install a new clutch and either install a new flywheel or have yours properly two step-resurfaced (AWD cars should have .826″ step height). If the clutch step height is too large your clutch may slip and if it is too small it may drag.
Clutch Pedal Adjustment
It is very important to adjust your clutch pedal for the optimal amount of free play. The AWD cars should have .5″ to .75″ of free play at the top. Too little free play and your clutch may slip and too much and your clutch may not fully release. We have a blog post with a detailed video on how to adjust this here.
Clutch Hydraulics
The clutch slave cylinder is a very common wear item and they are very affordable. It is a good idea if you are replacing your transmission to replace the slave cylinder and perform a clutch bleeding to assure great operation. It is the same basic procedure as bleeding brakes.
Please note that FWD and early model cars have a slave cylinder with a 3/4″ bore and the later AWD cars have a 11/16″ bore. You may run either slave cylinder with any year or AWD/FWD, but the 3/4″ bore slave will travel slightly less. You will need to adjust your pedal and you still may not get enough release, so consider running an 11/16″ slave.
Clutch Drag Test
Its very important to perform this safely, but the most sure way to test for clutch drag is to place the car on level ground with nothing in front of you.
Then depress the clutch fully and put the car in 1st gear. Now rev your car slowly to the redline and see if the car tries to creep. If the car creeps at all your clutch is dragging and must be fixed or you will destroy your transmission. We cannot warranty transmissions that are damaged from clutch drag.
Shifter Adjustment
It is equally important that the front to back and side to side action of your shifter is adjusted perfectly. The 6 Speed transmission does not have a front to back adjustment, but on the 5 speed it is important to get these centered to assure proper gear engagement and that you are not causing the shift forks to travel too far, causing damage.
The best way we have found to adjust the action of the shifter is to install the shifter cables on the transmission end and the put the transmission in neutral. Next remove the shifter boot inside the car. Then remove the cotter pin from where the cables attach to the shifter assembly. Loosen the jam nuts on the shifter cables and rotate the turn buckles until the eyelets will slip easily back on the shifter attachment points.
Finally put the cotter keys back and verify the shifter knob is centered side to side and front to back. A test drive will reveal if some minor adjustment is still needed to suit your driving preference.
Fluid Considerations
Traditional gear oil tends to not work well on the 3000GT Synchros in the AWD transmission. This is due to their small oil channels. Traditional gear oils were designed for all brass synchros. They had large oil channels and had gears that did not have needle bearings, but were bushed.
For a 3/S AWD its recommend to run what is typically referred to as a manual transmission fluid (MTF) instead.
Pennzoil Synchromesh has shown over time to be one of the best shifting fluids, but it breaks down rapidly and should be changed very frequently (every 3K) miles. Torco MTF is highly recommended for the Carbon Synchros.
Redline MTL or MT-85 have been shown to be one of the best all around fluids for the 3000GT transmission. Shifts nearly as well as synchromesh, but will last 10,000 miles or more and provide better protection.
Break-In Procedure
You need to cover your basics, such as careful installation, proper clutch operation, shifter adjustment, and run a quality fluid. There are still some steps to take to be sure your transmission performs at its best.
First Test Drive
Take the car around the block, carefully and slowly shifting, let the car warm up fully. The transmission may feel stiff, but it should not prevent you from shifting or “block” gears. If it does you should verify your clutch is not dragging once again. Bring the car back to your work area and verify their are no leaks, unusual noises and that the shifter feels normal. Its easy to get a wire or hose in the way of the shifter under the hood on these cars, so if anything feels odd check there first.
Second Drive
Now that you have verified everything is working normally its time to go on a longer drive. Begin to work the transmission a little bit harder. Shifting at 3000-4000 RPM is appropriate, but don’t jam it into gear.
It should start feeling smoother and smoother. Synchros are just like brake pads or clutches and will take time to develop a great wear pattern into the metal surfaces. Over the next few hundred miles the transmission should continue to get more and more effortless to shift. It may continue to even improve up to a few thousand miles.
You should change your fluid after the first couple thousand miles and then go on your regular schedule after that. Keep in mind that these transmissions have no filter, so its best to keep clean fluid in them.
You will see some dusting or material on your magnetic drain plug and this is completely normal. The first fluid change may also show some synchro material particles and that is also completely normal, but should reduce on subsequent changes.
3000GT Transmission Rebuild Conclusion
There are many parts that will wear in as your new transmission passes through its first few hundred to few thousand miles.
Synchros will bed and bearings will wear in slightly. Your gear teeth will wear together. If gears are replaced or your bearing pre-loads are reset your gear teeth will mesh slightly differently than before.
Its important to give the transmission time to wear in before subjecting it to full load. Avoid any launches before you have put at least 500 miles on any rebuilt transmission or transfer case. Avoid redline hard shifting for 500 miles. Your transmission rebuild will reward you with a long life!


